Guide to Mount Rainier National Park
Visited multiple times from 2022-2024

Mount Rainier from Reflection Lake – All photos in this post were taken on my iPhone 13 Pro and DJI Mini 3 drone
Mount Rainier is a 14,409-foot-tall active stratovolcano located in Washington State, along the Cascade Range. On clear days, it can be seen from hundreds of miles away. In 1899, Mount Rainier became the fifth national park in the United States, thanks to a united effort by businessmen, scientists, teachers, mountain climbers, and ecologists who lobbied Congress to protect the area.
Today, Mount Rainier National Park welcomes around 2 million visitors each year, and that number has grown significantly in recent years. To help manage the increasing crowds, timed entry reservations have been introduced for the Sunrise Corridor. You can learn more about that here.

Little Tipsoo Lake
The park is divided into five main areas: Longmire, Paradise, Sunrise, Ohanapecosh (closed for the 2025 season), and Carbon River/Mowich (which is currently inaccessible due to a bridge closure). Paradise and Sunrise are the most popular regions, known for their iconic viewpoints, scenic hiking trails, and vibrant wildflower meadows.
Although I’ve visited Mount Rainier National Park several times, I still feel like I’ve only begun to scratch the surface. With an incredible 158 trails throughout the park, I’ve only managed to explore a small fraction so far. Here are the hikes I’ve completed in and around Mount Rainier National Park:
Silver Falls Loop Trail (Closed for the 2025 season)
Union Creek Falls - East of the park
Boulder Cave - East of the park
Keep in mind that most of the park has no cell service. You might occasionally get a signal, but it's inconsistent and unreliable. Be sure to download an offline map or bring a physical one, and mark the trailheads you plan to visit ahead of time.

Bench & Snow Lake Trail
Where to Stay
Each time I’ve visited Mount Rainier National Park, I’ve stayed somewhere different. The first time, I didn’t plan ahead and assumed I could just show up and find a hotel or campsite, which was a big mistake. Lodging and campsites fill up quickly, especially in peak months like July and August, so be sure to book a few months in advance.
I’ve never stayed at the lodges or inns inside the park because they’re overpriced for what they offer. While they do provide easy trail access, it’s not worth the cost to me. I’d rather drive a bit farther to stay somewhere more affordable or comfortable. There are plenty of budget-friendly campsites and lodging options in the small towns surrounding the park. One of my favorite places to stay is at Wellspring Spa and Woodland Retreat in Ashford. There are plenty of other lodging options in Ashford as well as several restaurants.
Skyline Trail
Hike Length: 6-mile loop (or less if you take the Golden Gate Trail short cut)
Elevation Gain: 1,700 feet
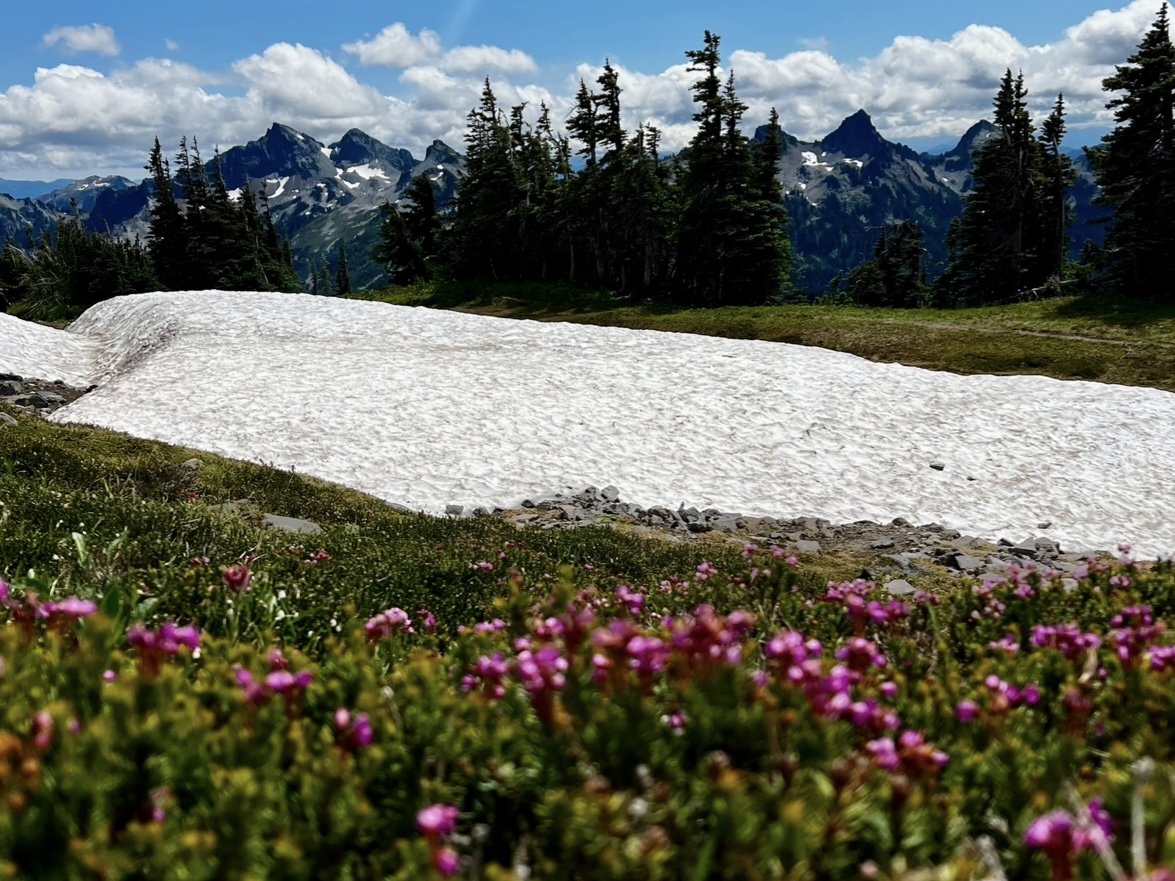
Note: Please stay on the trail! Signs throughout the park remind visitors to stay on the trail because the wildflowers and their fragile ecosystems have been damaged over the years by increased foot traffic. You can still get beautiful pictures of the wildflowers without crushing them.
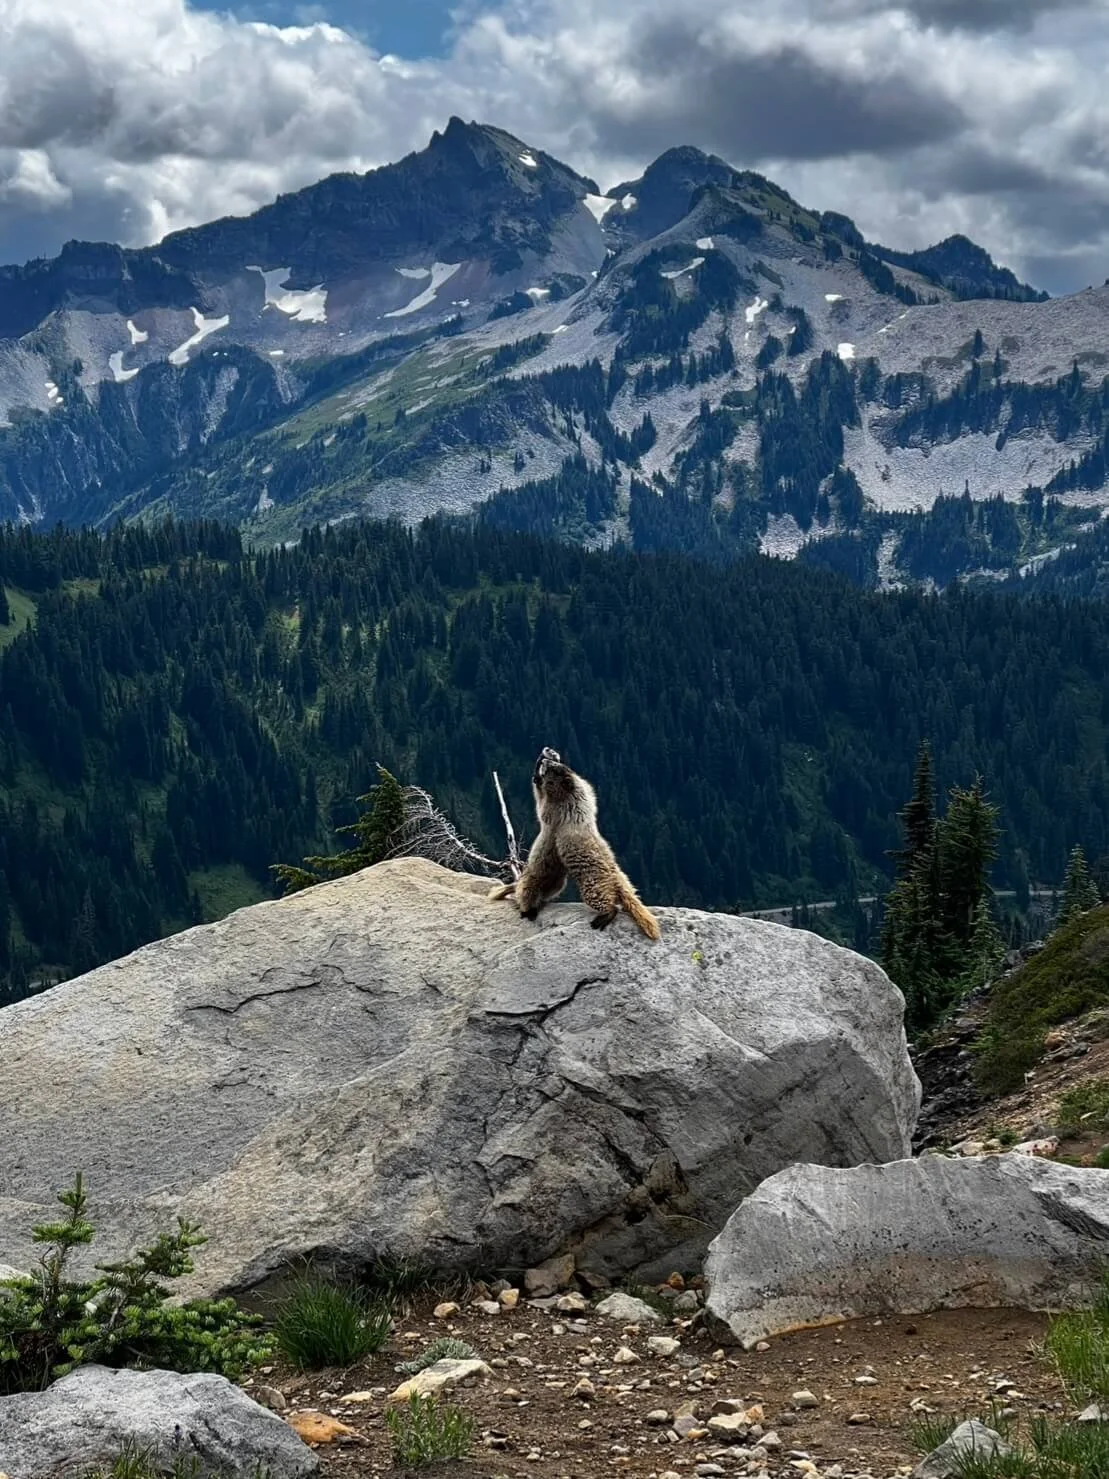
If you only have time for one hike, I highly recommend the Skyline Loop. It is one of the most popular trails in the park, so arrive early to secure parking. On a clear day, you will get up-close views of Mount Rainier, walk through wildflower meadows, spot wildlife, and cross lingering snow patches if you visit before late summer. My favorite part of the hike was watching two marmots battle over who got to stay on top of a rock.

Unfortunately, when I hiked the loop, Mount Rainier was hidden behind clouds, a common occurrence, as it often stays shrouded. Even so, I loved the trail and was able to fully appreciate the beauty of the surrounding landscape. Hiking the loop counterclockwise gives you a gentler initial climb, while going clockwise offers more dramatic views throughout the hike if the mountain is visible. To shave off about 1.5 miles, you can take the Golden Gate Trail shortcut. If you're hiking clockwise, you'll see the sign for this trail after descending from Rainier. If you're going counterclockwise, the trail appears just after Myrtle Falls.


Myrtle Falls

Hike Length: 0.4 miles one way
Elevation Gain: 185 feet
Myrtle Falls sits at the base of a short, steep hill and is easily accessible, so it tends to be busy. On a clear day, Mount Rainier towers in the background, creating a stunning and iconic view.
Reflection Lake

Reflection Lake is one of the most well-known spots in the park and requires no hike to enjoy. On a clear day, you can see Mount Rainier in the distance and even capture its reflection on the lake’s surface (hence the name).
Pinnacle Peak

Hike Length: 2.5 miles round trip
Elevation Gain: 1,050 feet
The trailhead for Pinnacle Peak is located directly across from Reflection Lake. On a clear day, you’re treated to views of both Mount Rainier and Mount Adams. This is one of my favorite trails in the park and, in my opinion, one of the most underrated hikes. Despite its short length, it’s packed with beauty. I saw a variety of wildflowers along the way and was able to capture Mount Rainier in the background.


Mountains and wildflowers weren’t the only things I encountered on this trail. On the way up, I spotted a little mouse, and during the descent, I came across a deer. The deer caught me off guard. I was near the end of the trail, zoning out and not paying much attention. When I looked up, it was casually walking toward me, unaware of my presence. I stopped in my tracks and watched from a distance. Eventually, we made eye contact and stood still for a few moments, just observing each other. Then it gave a little tail wag, as if to say goodbye, and disappeared into the bushes.


Naches Peak Loop

Hike Length: 3.2 miles round trip
Elevation Gain: 600 feet
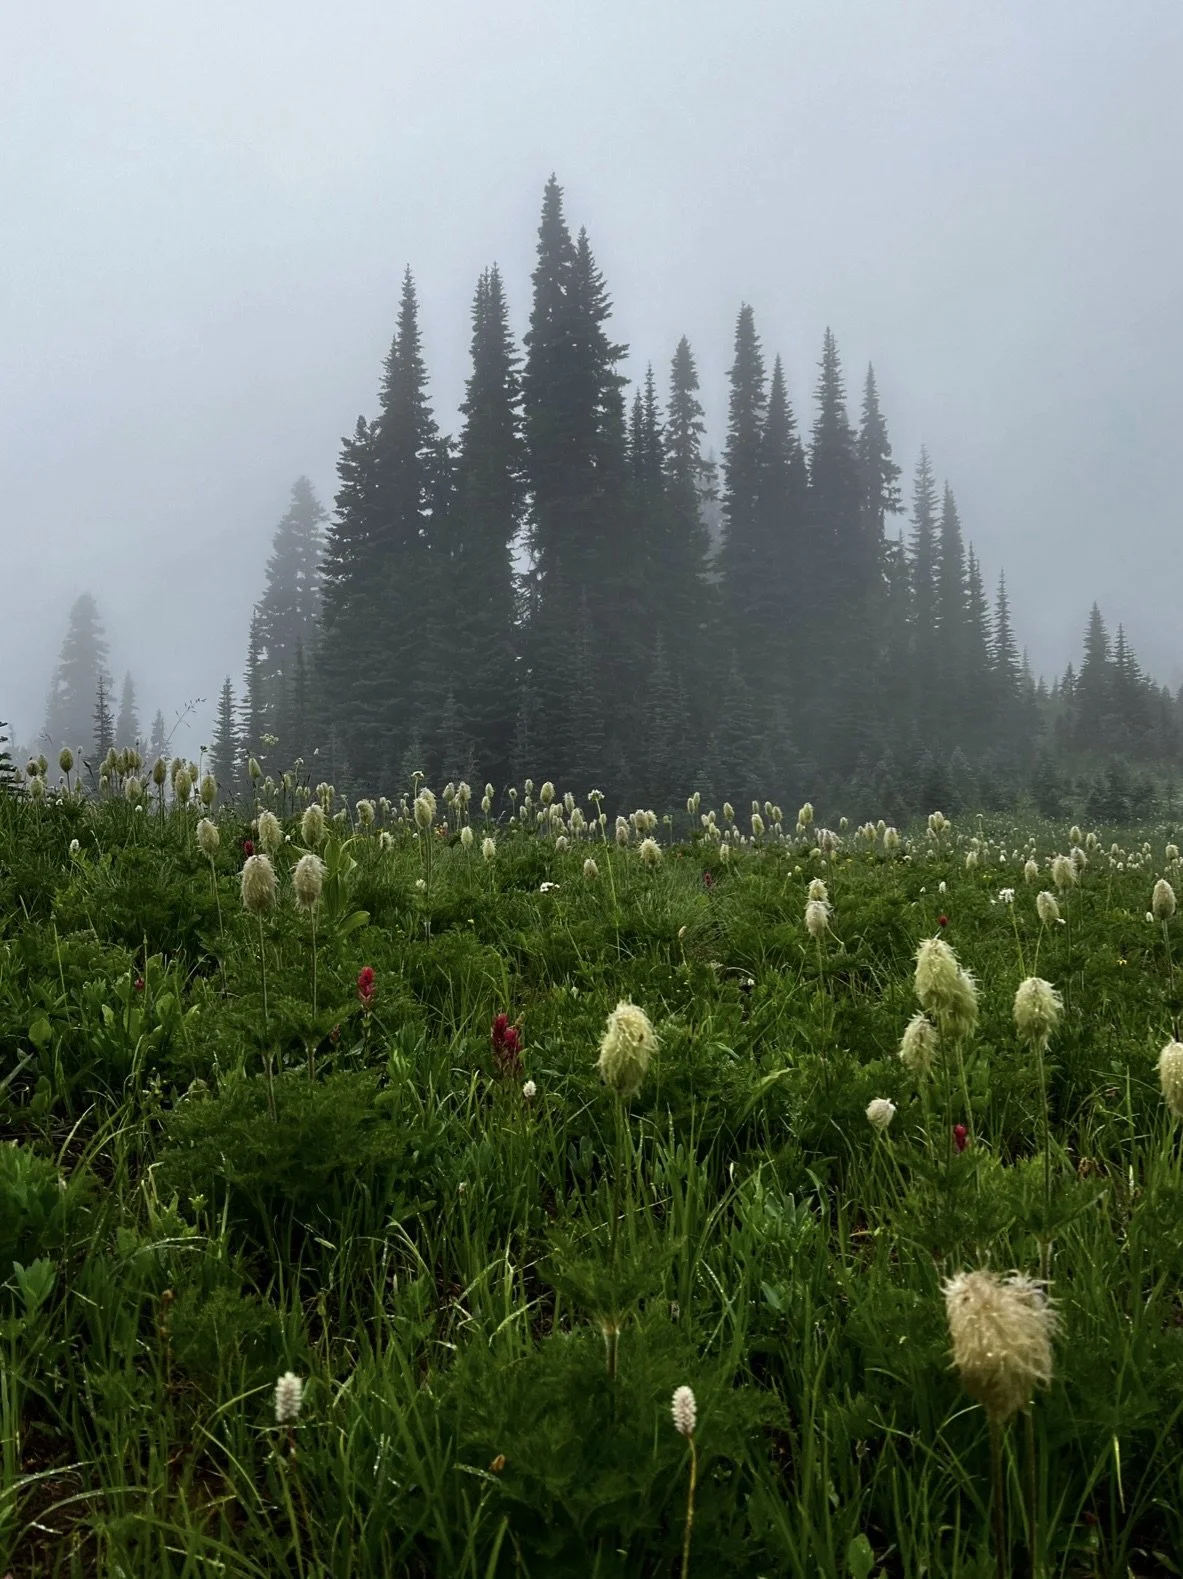
Naches Peak Loop is my favorite wildflower hike in the park. It was rainy and foggy the day I visited, which made the moody scenery even more beautiful. Along the trail, you’ll pass a vibrant mix of wildflowers and a few small lakes. You can start the loop from the north side near a small parking area for Chinook Pass or from the south side by Tipsoo Lake.

Dewey Lake


Tipsoo Lake

Hike Length: Less than a mile from the Chinook Pass parking area or less than 0.25 miles from Tipsoo Lake Comfort Station
Elevation Gain: Less than 50 feet
You can reach Tipsoo Lake either by finishing the Naches Peak Loop (if you’re going counterclockwise) or by parking in the Tipsoo Lake Comfort Station and walking directly down to the water. No matter which route you take, you’ll pass through forested areas and vibrant wildflower fields surrounding the lake.
Walking around Tipsoo Lake in the fog was a surreal experience. I stood for a while, watching the mist drift across the water, completely immersed in the stillness. I couldn’t believe how beautiful the area was, and I felt incredibly grateful to have experienced it in such moody weather. Being at the lake in that moment is something I’ll never forget.


Bench & Snow Lake

Hike Length: 2.5 miles round trip
Elevation Gain: 650 feet
The Bench and Snow Lake Trail offers a lot in a short amount of time. In summer, you’ll pass through colorful wildflower fields and, on clear days, enjoy views of Mount Rainier and Unicorn Peak. The trail begins with a short climb up a hill on the left side of the parking lot. Almost immediately, you are rewarded with sweeping views of Unicorn Peak to the south and Mount Rainier to the north.


The first lake you’ll reach is Bench Lake, marked by a sign about a mile into the trail. You can visit it either before or after exploring Snow Lake, as the detour is short and easy. On a clear, calm day, Bench Lake offers a stunning reflection of Mount Rainier, much like the one seen at Reflection Lake. Snow Lake is just a bit farther down the trail from Bench Lake.

Silver Falls Loop Trail

Hike Length: 3 miles round trip
Elevation Gain: 521 feet
Near the Silver Falls Loop Trailhead is Ohanapecosh Campground, a great base for hikes in the area. I hiked the loop counterclockwise. Less than a mile in, you’ll notice a strong sulfur smell as you pass over the Ohanapecosh Hot Springs. For the next mile or so, the Ohanapecosh River runs alongside the trail as it winds through the forest, leading you to the stunning Silver Falls. There are several great vantage points of the falls, including a large rock at the base you can climb down to. Eastside Trail branches off from the west side of the loop and leads to the north side of Silver Falls, where you’ll find smaller waterfalls feeding into the main cascade.
Union Creek Falls

Hike Length: 0.5 miles round trip to Union Creek Falls or 4.5 miles round trip to the end of the trail
Elevation Gain: Less than 300 feet to Union Creek Falls
Union Creek Falls is a very short hike from the parking lot. While the trail continues for about 2 more miles beyond the falls, I read that parts of it are washed out and can be difficult to navigate. I originally planned to hike the full trail, but after spotting a pile of bear scat near the falls, I decided to turn back. I was completely alone on the trail, and with no other cars in the lot, it didn’t feel safe to continue. Even though my visit was brief, Union Creek Falls was still a beautiful sight. About a quarter mile in, after climbing a small hill, two side trails split off to the left and lead down to the falls. The second one brings you the closest to the water.
Boulder Cave

Hike Length: 2 miles round trip
Elevation Gain: Less than 200 feet
Boulder Cave was formed over 10 million years ago when a series of lava flows mixed with sediment deposits were eroded by Devil Creek. This erosion caused the sediment to collapse, eventually creating the cave. The cave itself is more of a 400-foot tunnel than a traditional cave and is fairly easy to walk through, though it gets completely pitch-black inside. Be sure to bring a flashlight or use your phone’s light to guide your way. This area is also an important habitat for the Pacific western big-eared bat. To help protect this sensitive species, keep noise to a minimum, stay on the trail, avoid touching the cave walls, and don’t shine your light on the ceiling.
Note for the reader: I share these locations so that others can see beautiful places and enjoy nature as much as I do. Please be respectful of the outdoors and what condition it is in when you visit. Don’t go off trail, leave no trace, and pack out what you came in with.